Project page
The cheapo FPV wing
When I first saw the fpv wing drone from Parrot, the Parrot Disco, I felt so impressed that I had the build my own.
I wanted to make it as cheap as possible and I have no RC background and do not own RC hardware so I would rather use wifi and consumer hardware, like usb gamepad to control the drone.
Let's start from the beginning : the chassis
I've chosen the X-1 from Hobbyking because it's dirt cheap at $36
https://hobbyking.com/en_us/x-1-mini-flying-wing-epo-600mm-arf.html
Then with chassis came all the other required component :
Brushless Motor: AX-1806N: 7.61 USD
Servos 2xHXT900 Micro Servo: 5.38 USD
ESC: 8.30 USD
https://hobbyking.com/en_us/hobbyking-12a-blueseries-brushless-speed-controller.html
The ESC is the electronic tailored the drive brushless motor. More over it include a BEC (battery elimination circuit), normally used to power the RF receiver. The BEC is able to deliver a stable 5v 1A output to our control electronic.
An ESC is plugged directly to the battery and motor, and is supposed to take command from a RC receiver, but for this drone I will use a Raspberry Pi Zero, to send command to the ESC.
LiPo 3cell battery: 13.73 USD
2200mah is way above of the recommended capacity (and wheight) for the X-1, I'll just hope the X-1 will be able to handle the bulk and weight.
Misc
* Propeller mount: 1.63 USD
One propeller comes with the X-1 chassis but nothing to mount it on the motor comes with chasis or the motor
COLLET PROP ADAPTER FOR 3MM SHAFTS
* 4x 6X3 Propeller: 4.71 USD
Only one propller comes with the X-1 chassis, I but additionnal 2 pairs, it comes in pair because propeller of this size are usually made for quad with one CW and one CCW. Obviously useless of the wings.
* 5xMale XT 60 connectos: 2.02 USD
I've discovered the that battery comes with a square shaped plastic connector called XT-60. I had to buy the male counter-part the will fit the ESC.
* micro USB power connector: 0.50 USD
I need to connect the power coming from the ESC to the Pi Zero, doing it via the micro usb seems to me as the most modular way, as it can be then easily disconnected.
The Brain
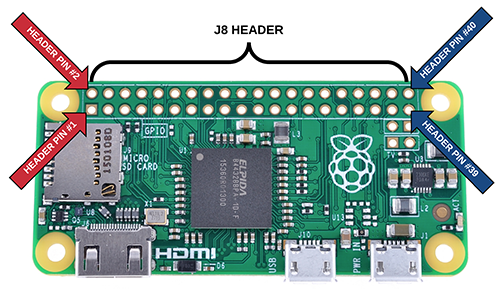
I would go for consumer grade part : a Raspberry Pi Zero will be used to stream the HD video through Wifi connection, and it will also process command through issued through TCP or UDP from a laptop.
* Raspberry Pi Zero : 6 USD
* Pi camera module V2 : 30 USD
* Samsung 8 Gb sd-card : 10 USD
The camera module for the Raspberry Pi is special in the way that it is a high speed bus connected directly to the Pi GPU which then support h264 hardware encoding up to 1080p a feature that no other single board computer feature.
* Alfa wifi usb dongle : 28 USD
The Alfa wifi is supposed the be "high-range", the Parrot disco is said to have a range of 2km, I do hope to be able to reach that range with this card. This is kind of uncertain as consumer wifi barely reach 100m usually.
Ok that sets us for 153.88 USD, much cheaper than the 1300 USD retail price of the Parrot Disco. But will it fly ?
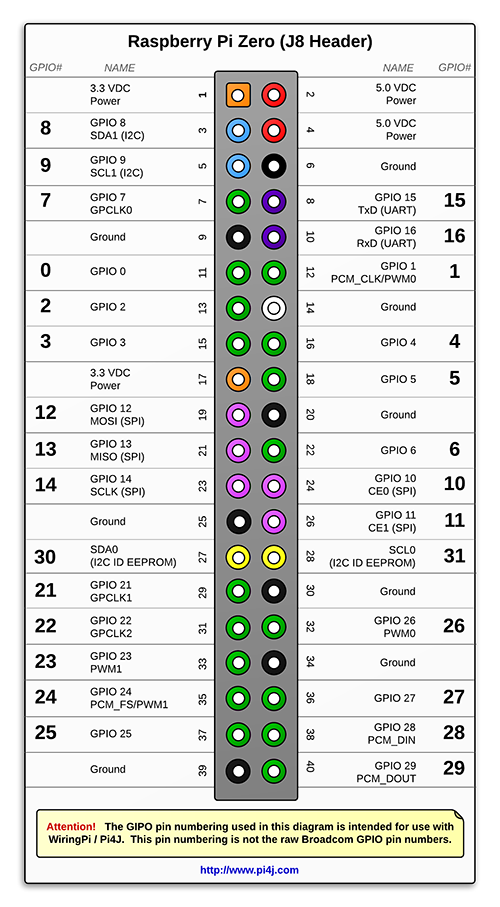
First off lets identify the pinout.
As I've already successfully managed to control the servos with an Arduino, I know that it requires PWM signal / 5v / Ground pins
ESC also requires a PWM signal and ground (but no 5v)
The Broadcom chipset supports hardware PWM, i.e. you configure it with the appropriate values and it will generate the required pulse. This is much more efficient and accurate than emulating it in software (by setting pins high and low at particular times), but you are limited to only certain pins supporting hardware PWM:
26-pin models: pin 12
40-pin models: pins 12, 19, 33, 35
I've finally understood why pin 12 and 19 are PWM0 and 33 and 35 are PMW1: It means that unfortunately each couple shares the same clock and duty cycle meaning that only 2 servo could be independently managed by hardware PWM, I have to look for a software solution.
ESC calibration in NodeJS with Rpio lib
I've try lots of combination of clock divider and PWM power to finally be able to get the motor moving. Here is the ESC calibration working for my HobbyKing 12A ESC (I take no responsibility for any burning motors!):
var rpio = require('rpio');

var options = {
        gpiomem: false,          /* Use PWM (requires sudo= */
        mapping: 'physical',    /* Use the P1-P40 numbering scheme */
}

rpio.init(options);

var pin = 33;           /* Used GPIO pin */
var range = 1000;       /* Range of PWM */
var max = 100;          /*   the bottom 8th of a larger scale */
var clockdiv = 256;       /* Clock divider (PWM refresh rate), 8 == 2.4MHz */

/*
 * Enable PWM on the chosen pin and set the clock and range.
 */
rpio.open(pin, rpio.PWM);
rpio.pwmSetClockDivider(clockdiv);
rpio.pwmSetRange(pin, range);

var MAX = 60; /* Input PWM duty cycle for max throttle  (6%) */
var MIN = 110; /* Input PWM duty cycle for min throttle (11%) */

var power = MAX;

function powerInput() {
  rpio.pwmSetData(pin,power);
}

function close() {
 console.log("EXITING");
 rpio.pwmSetData(pin,0);
 clearInterval(15);
 rpio.open(pin, rpio.INPUT);
 process.exit()
}

setInterval(powerInput,1000);

console.log("-- Starting calibration --")
console.log("Plug ESC power plug now and"
console.log("wait for 4 long beeps and 2 short beeps then press RETURN"

var stdin = process.openStdin();
stdin.on('data', function(chunk) {
  if (power == MAX) {
    console.log("Wait till motor start spinning then press RETURN and disconnect ESC");
    power = MIN;
  }
  else close();
});
Centering servos
When receiving a 6% PWM signal, servo will align to the center position.
var rpio = require('rpio');

var options = {
        gpiomem: false,          /* Use /dev/gpiomem */
        mapping: 'physical',    /* Use the P1-P40 numbering scheme */
}

rpio.init(options);

var pin = 33;           /* P33 GPIO */
var pin2 = 35;           /* P35 GPIO */
var range = 1000;       /* LEDs can quickly hit max brightness, so only use */
var clockdiv = 256;    /* Clock divider (PWM refresh rate), 8 == 2.4MHz */

/*
 * Enable PWM on the chosen pin and set the clock and range.
 */
rpio.open(pin, rpio.PWM);
rpio.pwmSetClockDivider(clockdiv);
rpio.pwmSetRange(pin, range);

rpio.open(pin2, rpio.PWM);
rpio.pwmSetClockDivider(clockdiv);
rpio.pwmSetRange(pin2, range);


function centering() {
  console.log("Centering");
  rpio.pwmSetData(pin,60);
  rpio.pwmSetData(pin2,60);
}

function close() {
 console.log("Exiting");
 rpio.pwmSetData(pin,0);
 rpio.pwmSetData(pin2,0);
 clearInterval(15);
 rpio.open(pin, rpio.INPUT);
 rpio.open(pin2, rpio.INPUT);
 process.exit()
}

setInterval(centering,1000)

setTimeout(close, 6000);
Low latency video streaming : I did get good result with this command that streams video straight from the raspberry Pi using netcat:
raspivid -t 0 -w 854 -h 480 -hf -ih -fps 30 -o - | nc -k -l 2222
Set the plane drone as a WIFI access point.
To be able to send command to the drone using the WIFI network, the most practical way is to set the plane as WIFI access point so that it can be seen and accessed by any WIFI device.
Configuration for dhpcd using a subnet 192.168.1.XXX
/etc/dhcpd.conf
option domain-name-servers 192.168.1.1;

default-lease-time 600;
max-lease-time 7200;

authoritative;

log-facility local7;

subnet 192.168.1.0 netmask 255.255.255.0 {
     option routers 192.168.1.1;
     option subnet-mask 255.255.255.0;
     option broadcast-address 192.168.1.0;
     option domain-name-servers 192.168.1.1;
     range dynamic-bootp 192.168.1.15 192.168.1.100;
}